 ORC week 3, here we go! If you have no idea what ORC I’m talking about (LOTR nerd alert), I’m participating in the One Room Challenge as a guest participant and working on our den over six weeks. I’m sharing weekly progress reports here and also linking up on the ORC blog, along with so many other room transformers – go check all the TCB going on! If you want to catch up with this room, I shared plans during week 1 and got walls painted for week 2. Which brings us to today…
Minimal and modern faux interior board and batten walls! For cheap! Ok, I’ll admit I was nervous about this crazy idea. It had the potential to go bad and we almost abandoned it mid project when things didn’t go as planned, but we reached success in the end with an interesting but quiet wall that provides architectural detail, which our house sometimes lacks. I want to nail boards into all my walls now!
But let’s start from the beginning. In an effort to keep the bright white walls from looking sterile and boring, I wanted to add some texture in the form of paneling. Let me sing the praises of surface irregularity on walls: it adds interest without adding physical stuff or clutter. I’ve been knocking around ideas for months, finding this post especially helpful. I kept coming back to clean, minimal, narrow, vertical paneling. Something that could be original to our 1961 ranch house and would mimic the exterior (excuse the Halloween post…I really need to photograph our new exterior paint and this is all I got right now ha!). Something like:


I even considered doing interior Eichler siding. But every option was more than I wanted to invest in this room, because all required completely covering the entire wall surface with different materials. Again, saving up for pretty wood walls in our family room right now, a splurge, so the den walls needed to be low budget.
Finally, I floated the idea of doing faux board and batten right over our plaster walls. The correct process for board and batten is a flat and smooth board surface behind your battens, which is a lot of material, labor and MONEY! But what if we nailed the boards directly onto the walls? And crossed our fingers that our weird 60’s hand-textured plaster didn’t stick out grotesquely. I got a reluctant yes from my woodworker husband who really likes to do things the right way…on the condition that I would fully be in charge of removal and plaster repair when the day comes I change my mind. I have a reputation I guess???
The price was certainly right with boards being $3.60 each, so we decided to go for it.
Materials
- 8 foot 1×2 trim boards, primed
- nail gun
- wood filler
- caulk
- matte paint (I used Behr Ultra Pure White)
We planned on doing the whole room at 6″ spacing, which brought the total to around $300. But after seeing the boards in the space, we changed course. First, we expanded the spacing to 9″ because it felt less chaotic. Then we increased it to 9.5″ to avoid nailing into electrical work. We made a spacing jig to easily keep the boards straight and even as we nailed. 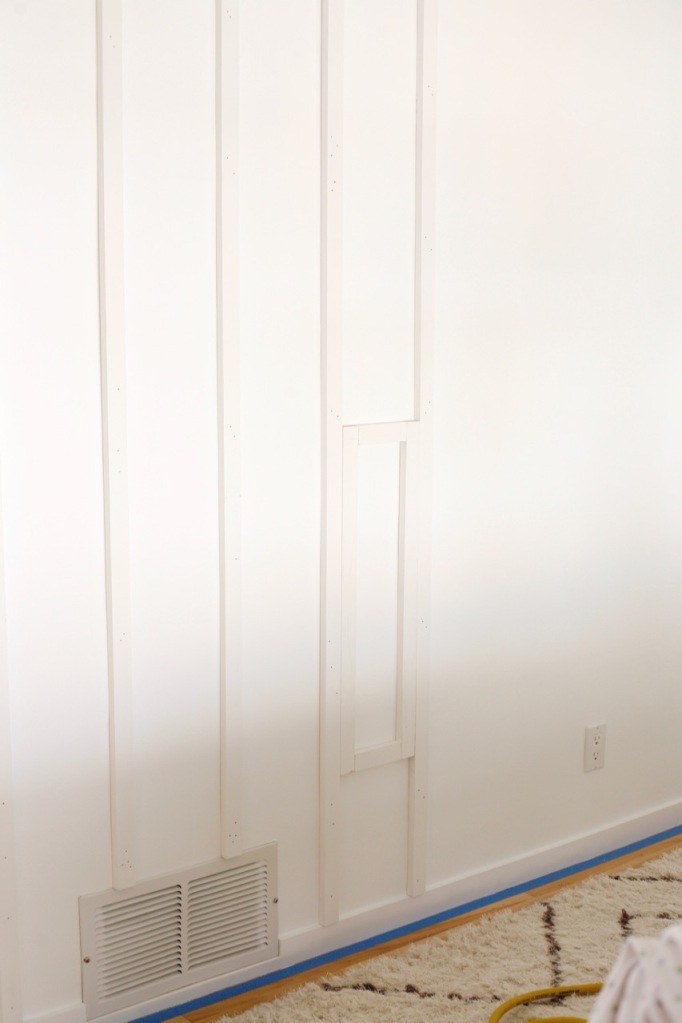

 But we quickly hit a literal bump. As we started hanging the (straight) boards, it became immediately apparent how wavy our walls are, creating major gaps between the boards and the wall. What we thought would be a 5 nail/board situation was turning into a 30 nails/board situation, and that still couldn’t close the gaps. Visually, things were not pretty. My do-it-right husband was frustrated with the ratty do-it-yourselfer vibe. While I was confident that caulking would conceal the uneven wall that the faux battens were emphasizing, I was honestly happy enough with the dramatic improvement brought by the white paint alone to not push this one. So we talked about abandoning ship.

 But instead reached a compromise. Just this one wall instead of this whole room. Less invested in time, money, and damage/future removal (because my husband is convinced I’m going there). Which was more than fine by me. I’ve never met an accent wall I didn’t like, and just this one wall of texture has brought immense warmth and dimension to the entire room.
Aside from the mid-project discussions, the entire wall of boards (or “battens”) went up fast, within an hour. The most time intensive parts were planning the spacing before, and the filling/caulking/painting after (which, by the way, downplayed the wavy walls immensely). And the total price came to only $80. Amazing.


 One thing to note, I was careful to keep the details extremely simple to avoid any farmhouse feels with this project because it had the potential to go real country real fast. The key to keeping it modern and true to the era of my house, I believe, is narrower boards, close spacing, taking the boards all the way to the ceiling, and letting them overhang our baseboard. (Taking them all the way to the floor would be even better, but unfortunately not an option for us.)
 I was worried about the plaster texture showing and IT IS FINE! Using matte paint definitely helped. I think anything with a glossy sheen would have been a bad move. I am beyond happy with this project. Such HUGE impact for not a ton of money or time. xoxo
![]()

What did you caulk with? I had a carpenter do something similar, but didn’t remember to ask that the windows behind it were covered. And there are light leaks in some weather.
LikeLike
Oh no, that’s a bummer. I linked to the caulk I used in the post, but I might get something heftier for use with windows! Hope you can fix it.
LikeLike
Looks so good,
LikeLike
thank you!!
LikeLike