 Buckle up for a long post about a 20 foot wall of luan wood! Done on the smallest budget you could imagine! Changing the entire feel of the house! Hopefully this info can help you add period-appropriate wood walls to your mid century house, or send you in the right direction if you are replacing original luan paneling.
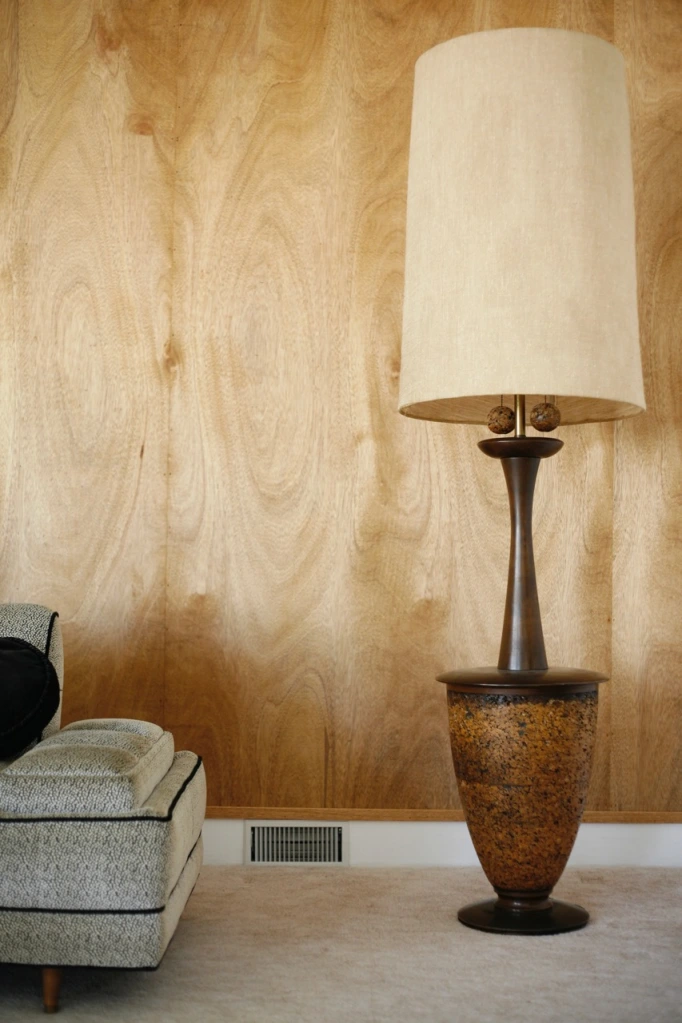
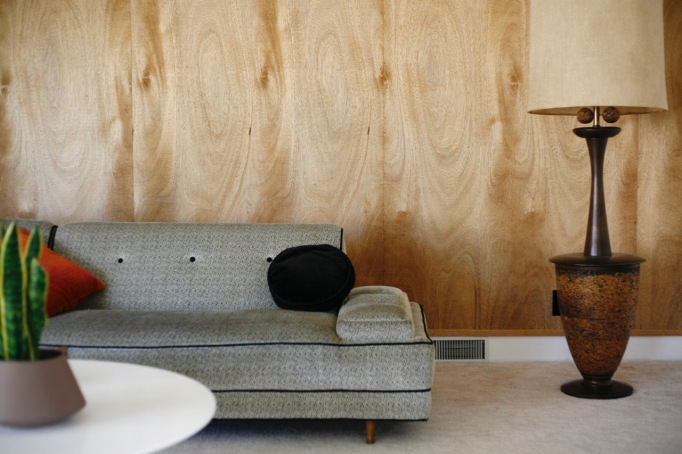
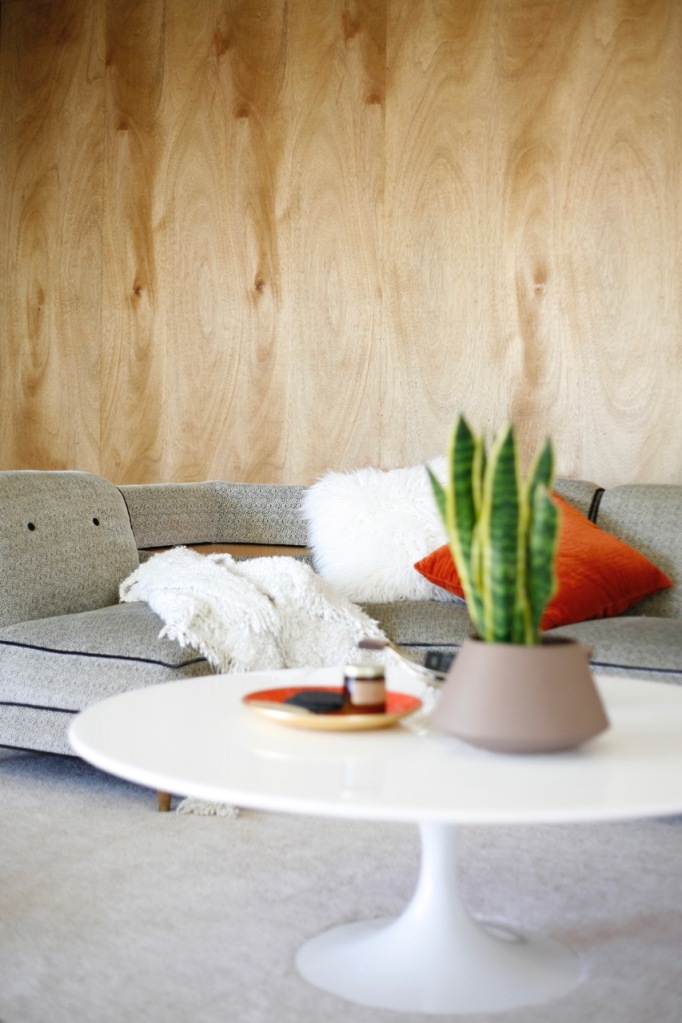
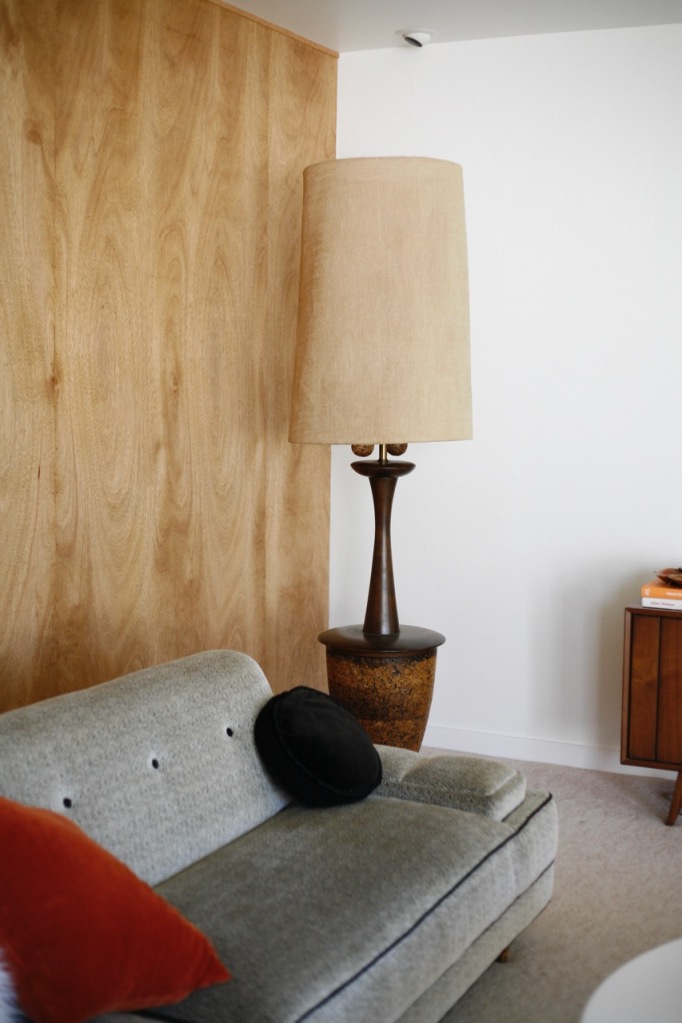
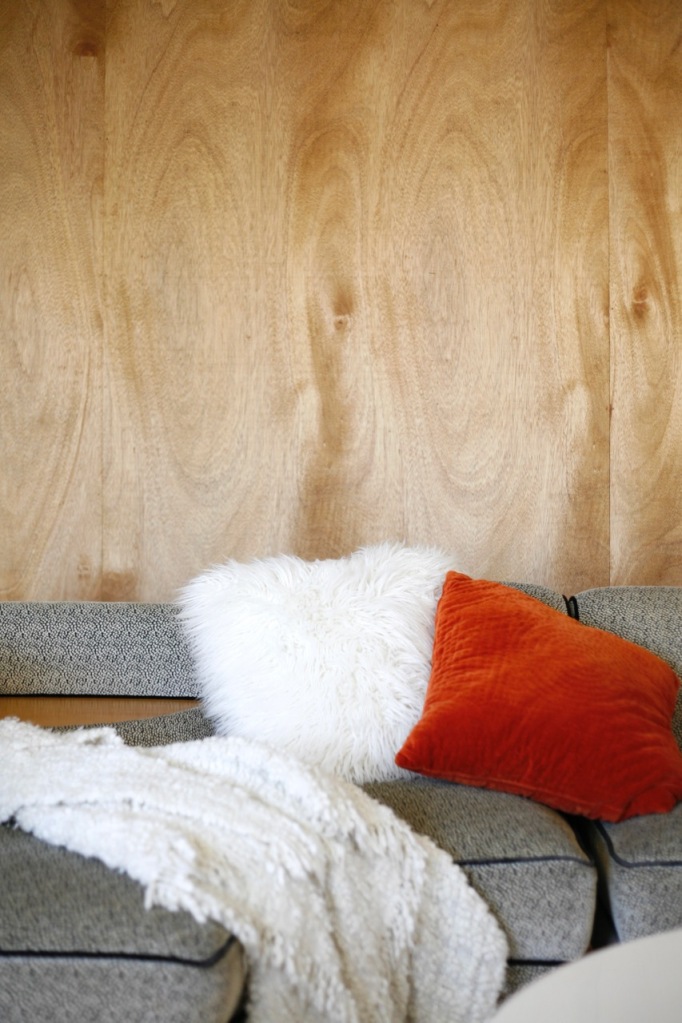
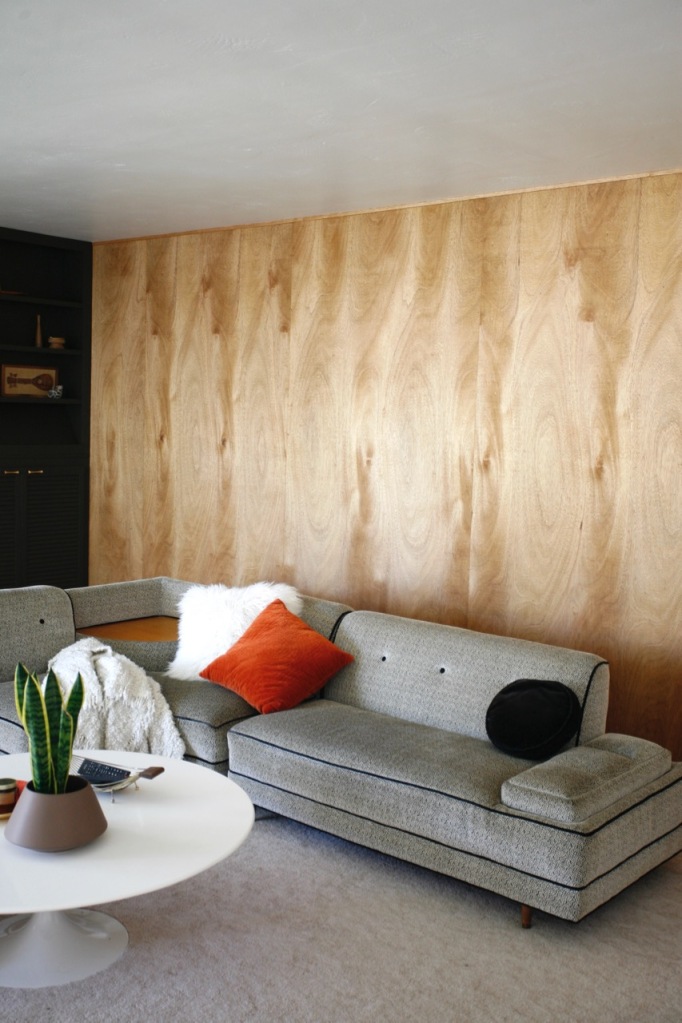
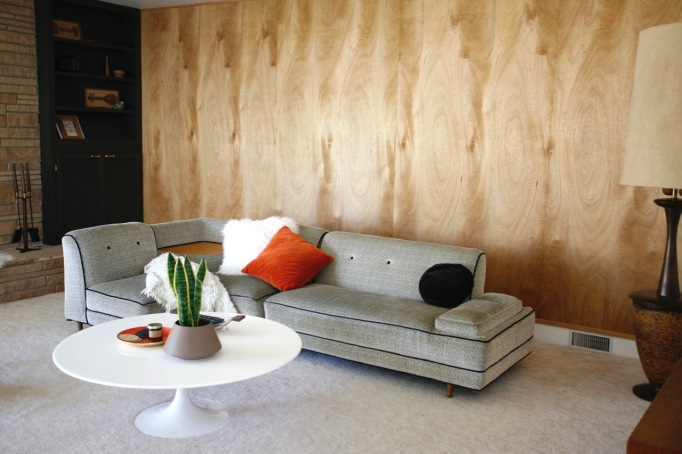
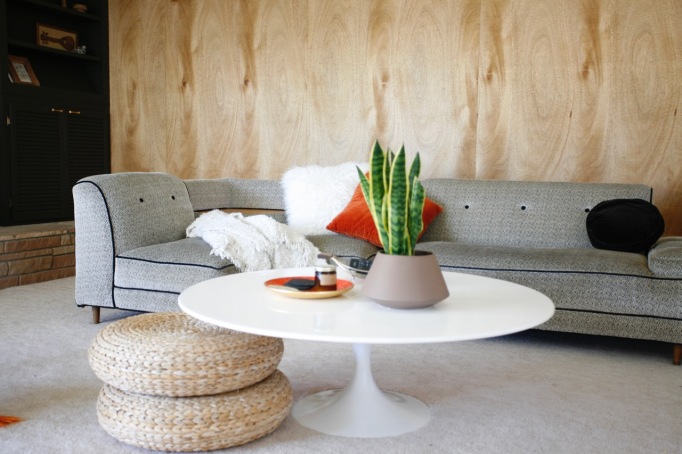
But first a little backstory on this room…it’s a rad sunken living room with the best rock fireplace and the selling point of the house for sure, but I have never been able to figure it out. I’m constantly complaining about it. Problems: the room is really big and even large scale furniture and art pieces look dinky and get lost in here. The fireplace and TV compete for attention on opposite walls. It’s shadowy thanks to a corner sliding doors/windows – but not in a cozy way, more in a sad way. From day one, in my opinion, the room has been screaming for wood. And I’ll be danged if I don’t listen to my walls. It should have been this woody all along (oddly, it sort of was…the little wall on the opposite side of the fireplace is actually painted over luan, done long before we took ownership). Meant to be!
Here’s a slew of photos of the completed (nearly – I’m still filing nail holes) project. Scroll down for the wordy how-to!


MATERIALS:
4′ x 8′ 1/4″ luan sheets, found at local lumber yard
Nail gun and nails
2″ finishing nails
Watco Danish Oil in Medium Walnut
Stain applicator
Trim pieces (we used this and this in oak)
Fill sticks for nail holes
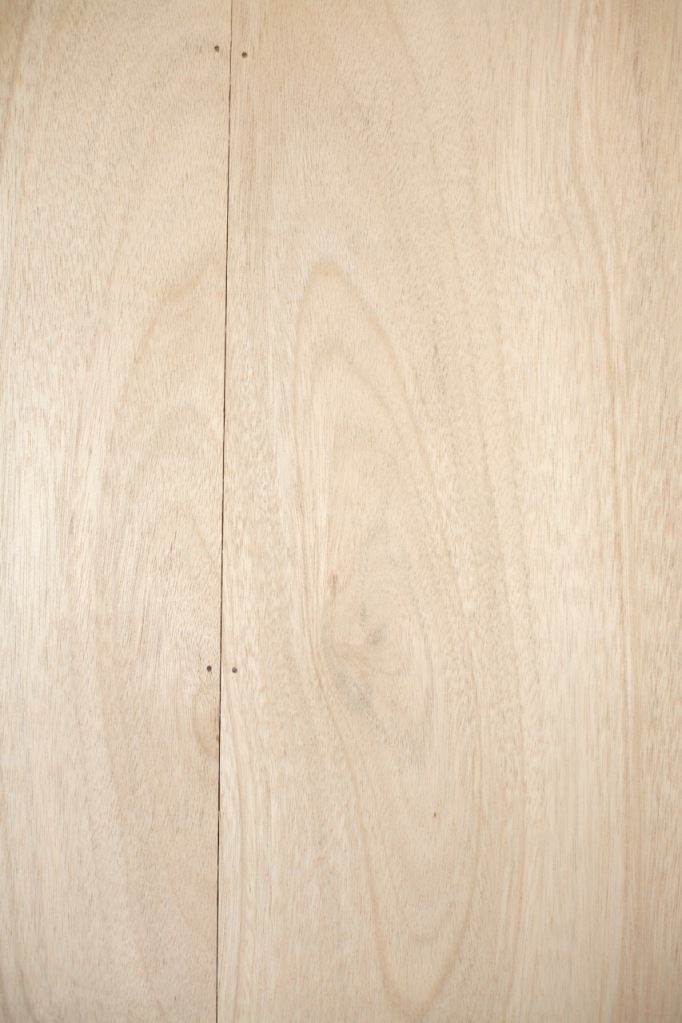
Now onto the lengthy process. First was choosing the wood. We ended up with very cheap, and very mid century appropriate luan, but took the longest road there. We began with the assumption that we’d be doing “cheaper” birch or maple plywood stained to look like walnut, for around $300. But when we found walnut plywood for only a couple hundred more, that became a front runner. I was hesitant only because it might look like a 90’s jazz club instead of a 60’s rancher, so we explored other options before committing. Under the influence of regional appropriateness and the “only a couple hundred more” justification, redwood tongue and groove, a mainstay of mid century CA central coast homes, took the lead. Until we bought some samples and actually priced it out and $1k was the total. The pendulum swung so hard in the opposite direction and finally stuck: humble, Eichler-inspired 1/4″ luan paneling.
If you are unfamiliar with luan (or lauan), it’s a general term for plywood sheets made from various Southeast Asian wood species. Often called Philippine Mahogany in the 50’s and 60’s, it has no relation to true mahogany. Utilized for it’s light weight and strength, luan was widely popular as a door and wall material in mid century homes – notably the thousands of Eichler homes built during the era. This is a great article about Joseph Eichler’s love of luan. If your home is 60 or 70 years old, it probably has luan something. Ours: every single closet, pocket, and regular door. Today it is most often sold as an underlayment material, sometimes called Meranti instead of luan. If you are willing to shop around and dig through stacks, you just might be rewarded with a beautiful wood for a crazy low price. We paid just $18 per 8’x4′ sheet after finding some gorgeous pieces at our local hardwood store. Yes, all that bookmatched wood was less than $100!
Hanging it was harder than expected. I must mention that while hanging wood directly on studs is MUCH easier than any other hanging scenario, it is likely not up to fire code. Eichlers had a sad reputation as “10 minute houses” because they would burn that fast, so no shame at all in hanging wood directly over drywall! In our case, we hung directly over our weird 60’s plaster walls that are full of waves and not even a little bit square. Thankfully, the 1/4″ sheets have a lot of bend and are relatively light weight, but we used A TON OF NAILS. No adhesive in case the project was a flop, but a nail gun + finishing nails galore! We screwed a level guide board into our wall (the one on the floor in photos, I neglected to take a photo in process) for the sheets to rest on while we nailed them in place, and then removed that board/filled those holes.


 We tried out a ton of stain options on a test panel and landed on simple Watco Danish Oil in Medium Walnut, an authentic medium warm brown with minimal sheen. Luan is photosensitive and will darken and redden with time, most quickly in the few months after install (hence the floating furniture and bare wall), so take that into account when picking a stain.
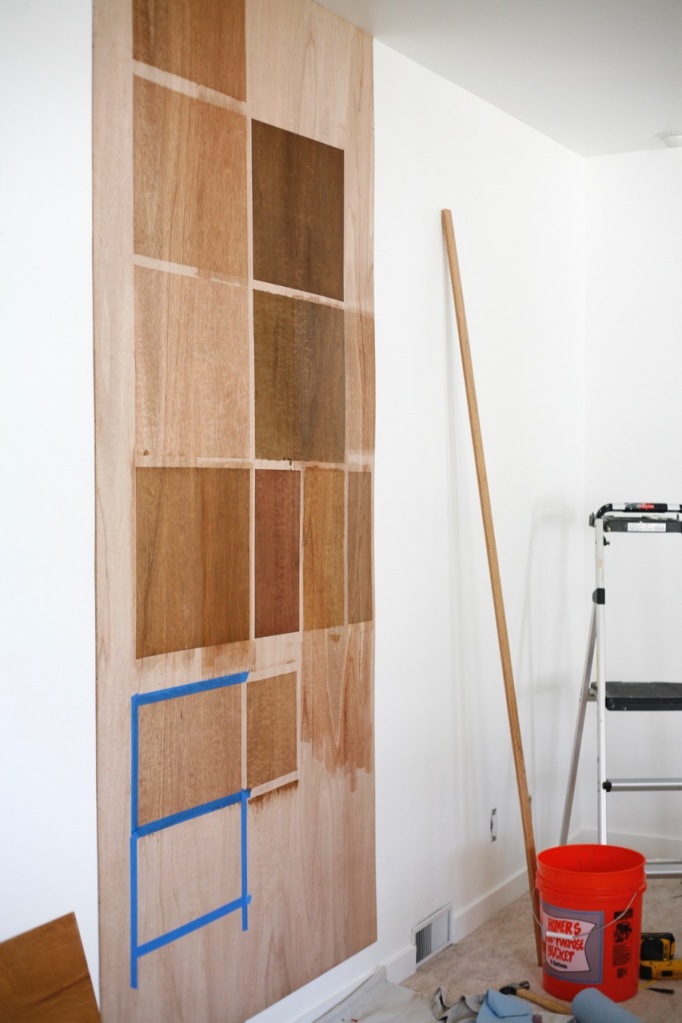 Below: L medium walnut Watco, R dark walnut Watco.
 We oiled in place with a paint pad applicator and things were incredibly messy at first, but we got a system down! Check my “wood wall” IG story highlights for a video of our process. Watco is a wipe on, let sit for 15 minutes, wipe off situation so best as a two person job. We only did one coat. Danish oil isn’t great to breath in so be sure to use a vapor respirator and ventilate. We applied while our kids were out of the house for a few days just to be safe. Below you can see from left to right: raw wood, wood with Watco applied, and Watco after wiping.

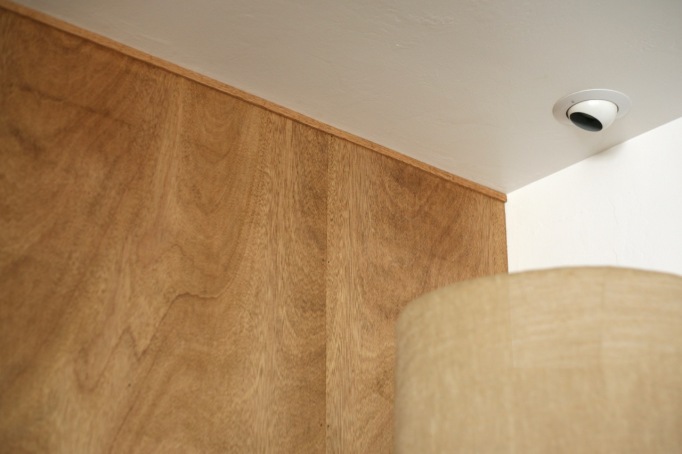
 While we did the best we could to hang the panels level and straight on our wonky walls, we needed trim along the ceiling to hide the irregular, wavy meeting of our ceiling and walls. Pliable 3/4″ oak trim did the job. We looked for the lightest oak pieces we could find and they match the luan quite nicely once also stained with Watco.
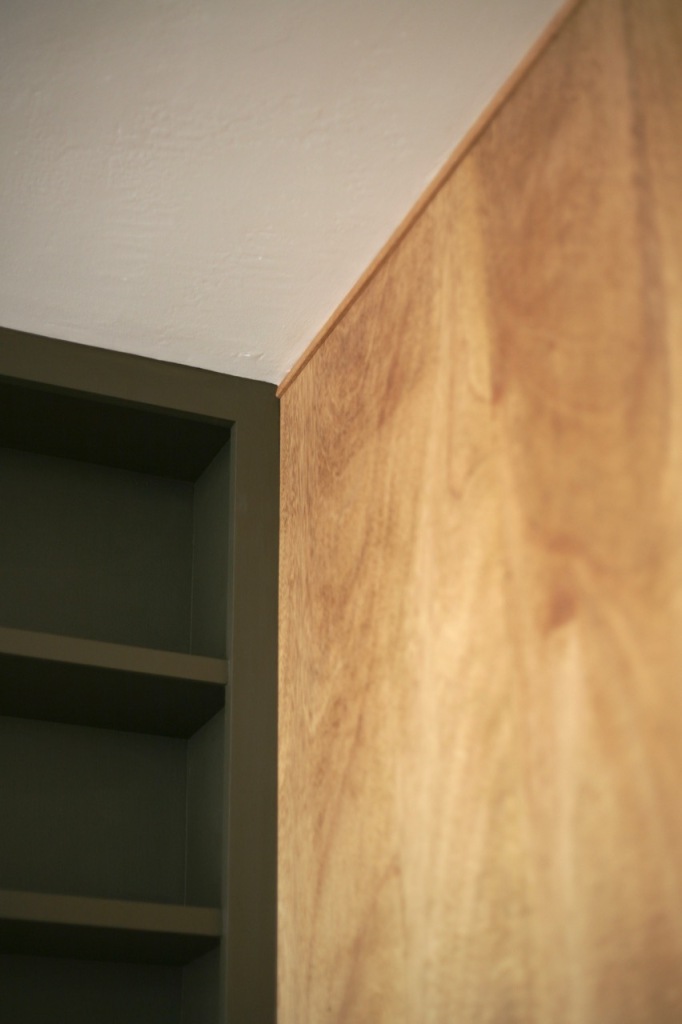
 You might have noticed that our wood doesn’t reach the floor and there is a reason for that. Our walls are almost 9′ and the luan comes in 8′ sheets. We made the decision to only span 8′ (plus a few inches of trim) instead of piecing in additional sheets and risking a choppy look. We debated whether to push it up to the ceiling or bring it to down the floor, and the tall fireplace/cabinet dictated that ceiling height would look better. That left us with the problem of what to do with the empty inches near the floor. One solution was to cover it with super chunky wood trim, but once the panels were in place we were way into the floating look. We removed the baseboard, cleaned up the bottom of the wall, put in a small trim piece, and called it done. 1 1/4″ oak trim (routed to fit over the luan) frames the bottom of the sheets.
 Last up, and a job I’m still working on, is filling all those nail holes. After some trial and error, I’ve found the greatest success with using Varuthane crayon fill sticks in two different colors, #2 and #3. The luan is varied in tone so a mix gives great flexibility to get the closest match for each spot. Again, watch my IG highlights for a video!
I can’t begin to tell you how happy I am with this project. Not only does it look authentic to the house, it has tied everything together and brought out the best in what we already had, adding immense warmth, texture, and interest. The space, for the first time, feels at human scale – spacious, but cozy. I even removed a ton of furniture and accessories in here because the wood carries so much visual weight on its own. A wannabe minimalist’s dream! How can this be one of the most affordable projects ever?! I DON’T KNOW BUT IT IS!!! xoxo Jenny

My god I love this! You’ve inspired me. We’d been talking about doing a mirrored wall with overlays on one of our dining room walls but now I’m leaning towards this (and so much more friendly to the wallet) and continuing it into the kitchen. Our condo is from 1968 and we are trying to take it back to its glory. My husband introduced me to your blog after he was inspired by your outdoor screens that we are going to do as a room divider for separating the living and dining room. Just love your aesthetic! YES to bright white walls!
LikeLike
Ooooh that sounds like such a fun project!!! And yes this is way easier on the wallet than most anything else! Thanks so much for the kind words and best of luck on your projects!
LikeLike
Love this! I’m thinking about a similar approach to a small office…some midcentury color and a plank ceiling. Did you use 4×8 sheets? The look thinner to me, did you cut them down or buy them 2×8? Maybe my eyes are playing tricks on me. Well done. Looks fantastic.
LikeLike
We did not cut them, they are 4×8. Our wall is deceptively long and the matchbook grain makes it hard to see, but yes 4×8. Good luck! Sounds like a fun project!
LikeLike
Love the look! Curious how you finished the seams between the sheets? It’s hard to tell from the photos. Are the sheets just butted against each other? Also trying to remember how they did this in the 50’s.
LikeLike
Yep, they are just butted up against each other and then nailed along the seam. If you scroll down in the post, you’ll see a closer look at the seam in one of the photos.
LikeLike
What about the seams that appear every 4’? I’m hanging luan on my ceiling and will use a faux beam approach to address the obvious seams.
LikeLike
I am so glad to have found your page! we have a mid century tri-level that we are slowly putting back to period correct details. We will be using your guide to redo our fireplace wall that currently has a 90s colonial look. Cheers!
LikeLike
Just completed this project in my home. Gave my living room exactly what it needed! Thank you for posting all the details-we used every one and couldn’t be happier with the outcome!!!
LikeLike